Below, Sevaral examples are presented for your understanding more deeply TiPiT.
Example:
Input images -
 Original image |
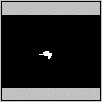 Mask image (Cutting off the bird) |
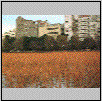 Background image (Deleting the bird) |
The following table shows the making process in which 'Horizontal' mode is selected as a perspective selection.
| Display in the Swatch Window | Operation |
|---|---|
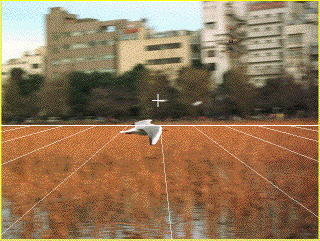 |
Step I: Perspective selection. The perspective set line is fit onto the boundary line between the ground and the buildings. The height of the vanishing point ( marked "+" in the figure) is adjusted as to be the same or similar value of the cameraÅfs height. |
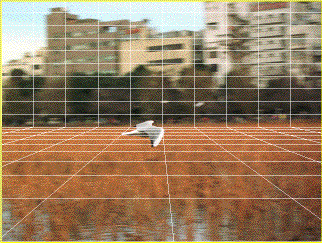 |
Step II: Perspective specification. The polygons of the background are generated. In the case of this figure, the polygons mean "Floor" (ground) and "Goal"(buildings). |
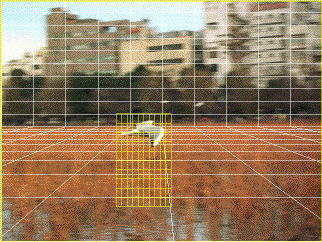 |
Step III: Making and editing new regions. The new region which encloses the bird in the figure is made. Then the distance between the buttom of the region and the bird means the distance between the actual ground and the bird, so that the editing process is carefully made. |
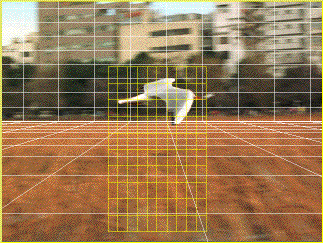 |
Step IV: Camera positioning and generating test sequences. The left figure is a generated image, which is taken from the test sequence with camera positioning being controlled. |
| Display in the Swatch Window | Operation |
|---|---|
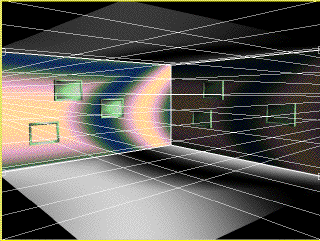 |
Step I: Perspective selection. Select "Double" in the menu of "Vanishing Point". Similarly to one-point perspective, the perspective lines are fitted onto the original image. |
 |
Step II: Perspective specification. In the left example, the four polygons are generated as the ceiling, floor, and right and left walls. |
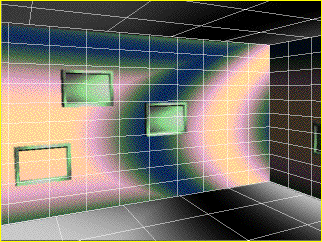 |
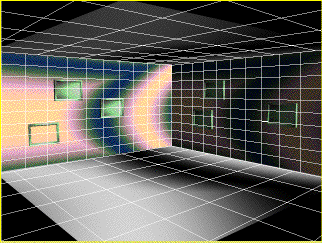
Step III: Camera positioning and generating test sequences In the left image, camera positioning is arranged, in order for the camera to zoom into the left wall. |
| Display in the Swatch Window | Operation |
|---|---|
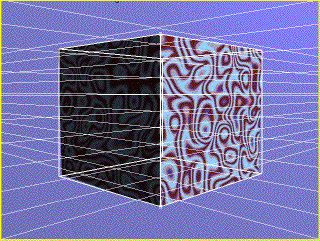 |
Step I: Perspective selection. Select ÅgObjectÅh in the menu of ÅgVanishing PointÅh. Similarly to one-point perspective, the perspective lines are fitted onto the original image. |
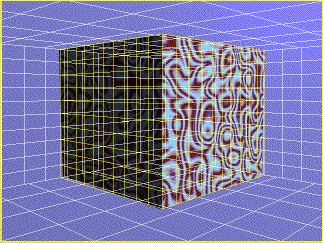 |
Step II: Perspective specification. In the left example, the four polygons are generated as the ceiling, floor, and right and left walls. In addition, the two regions are automatically generated for the two polygons of the cube located in the center of the original image. The regions are set as default, unlike one-point perspective cases. |
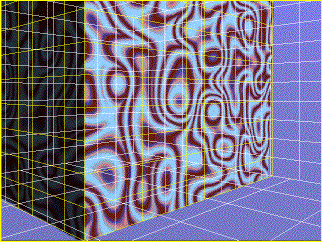 |
Step III: Camera positioning and generating test sequences In the left image, camera positioning is arranged, in order for the camera to zoom into toward the right direction. |